|
Mt. everest model
On this webpage I'll show you how to make a mt. everest model.The techniques presented on this page are intended for the structure to be safe for a pet lizard or tarantula to make it's home. This mountain could also be used along with other wargame miniatures. Hopefully you'll agree that this is one of the more cool hobbies you can spend your time doing. This is the first project on this web site whereby I used a different technique than all of the other projects before this.To do the sculpting of the polystyrene I used a combination of two hot wires from the Hot wire foam factory. One of the obvious benefits of doing hot wire sculpting is that it's rather effortless and possibly makes you look like you're a better artist and you actually are! The other benefit is that there is very little mess. With the old technique I used to use, there would be thousands of tiny white particles as a result of cutting through the Styrofoam. With hot wire carving you only get the pieces you remove -there is no particle crumbling. With the old technique I would be finding particles of polystyrene months after having finished a project. Check out the hotwire foam factory -they will make your Styrofoam sculpting easier and less messy. If you're creating this for a pet lizard, or if you're just interested in creating more wargame miniatures check out the video below on how to create a mt. everest model. The first thing I did was make sure I practiced a little bit with the hot wire from the hot wire foam factory. I created some practice pieces and got the feel of what It was like to sculpt using a hotwire instead of a knife. Then I proceeded to research various pictures of mt. everest and the rocky mountains and other pictures depicting a mountain range. 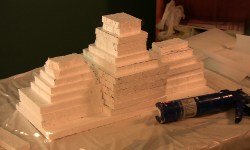
I measured out how long and wide I wanted the mt. everest model to be, and figured out how tall I wanted the sculpture to be. Then I cut out a number of rectangles that were of a similar size, and applied a little bit of glue just in the center of each rectangle. I did this because I knew I only had to keep the rectangles stuck together enough until I moved on to the grouting stage. I knew with the structure being a mountain, that the shape of it would slope downward. Because of this I knew that the hot wire would not have to pass through any glue because I would never be cutting near the center of the mountain.
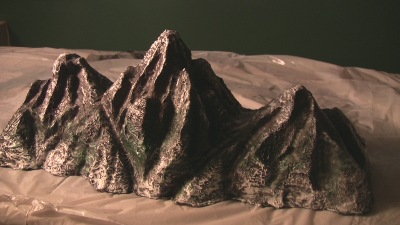
Once the 2 to 3 layers of grout was dry I proceeded to add color by using acrylic paint. Again, referring to the pictures of mountains I found on the Internet I applied various colors such as gray for a base and white to indicate snow on the top of mt. everest followed by a little bit of green towards the bottom to indicate some trees or plant life at the base. If you're creating this for wargame miniatures you could always add some buildings or other various structures at the base of the mountain. 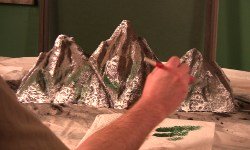
Once the paint was dry I went on to the sealing stage. You'll want to use 3 to 4 layers of a nontoxic sealant if you're creating this for a pet lizard or tarantula. Even if you're not creating this for a pet -sealing your project will make it stronger and ultimately make it last longer. I used a product called Shields all, which is a nontoxic when dry acrylic sealant. Check out the faq page on my website for more information on the materials I use. As a final stage you can sprinkle colored nontoxic sand on your mt. everest to counteract the shiny finish that the nontoxic sealant leaves behind.
|


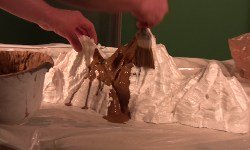 Once I had the shape of the mountain cut out I proceeded to the stage of grouting. You want to apply at least 2 to 3 layers of grout to add strength and texture to your mt. everest model. With the grout applied it will be much easier to enhance the texture of the mountain when you begin the painting process.
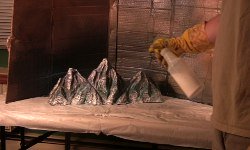 If you're looking for fun hobbies check out more of the projects on this web site. Be sure to watch the video above on how to create this mt. everest for your pet lizard or for your wargame miniatures.
