How to build a waterfall
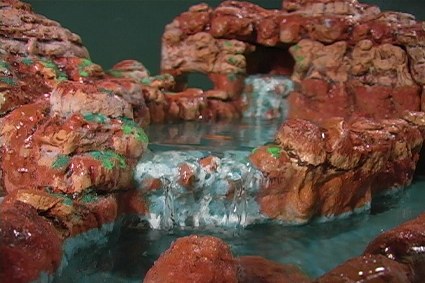
On this webpage I'll describe how to build this waterfall.
***I can no longer recommend building this for a living
creature. The steps involved to make sure it's safe can
be quite challenging and might wind up being a danger to a
pet. I have NOT made one of these for a living creature,
so even though the sealants (non-toxic) and process was
designed for safety, it may potentially be unsafe. I can
only recommend building this for recreation and not for a pet.
If you do decide to build this for a pet you should
research whether or not a waterfall would be appropriate
for the pet you have. A lot of times it can be a danger
to a pet. Even if the pet you have is comfortable around
water, you need to make sure the PH of the water is where
it should be concerning the type of pet you have. Also,
the water needs to be dechlorinated, -follow the steps to
make sure the water is tested and safe. Water should be
changed at least every other day. With this type of
process -leaks can happen and if you haven't sealed it
correctly -it can be hazardous to a pet's health. Your
pet's safety should be your biggest concern, the best
route might be buying one from the pet store.
Let me start off by saying: as with every project on this website -if you attempt to build this waterfall it is at your own risk, specifically at the risk of your own pet. Lizard-landscapes.com cannot be held responsible for accident or injury pertaining to the use of the techniques described on this website.
Learn the techniques on this webpage and then take it upon yourself to search for other resources that might be more informative to help you make educated decisions pertaining to the creation of your own model waterfall.
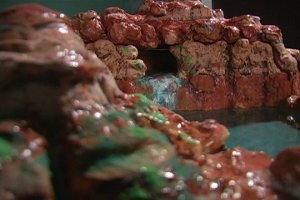
I have researched this process and have taken every step I can to build the safest homemade waterfall possible. But as we all know, problems can occur and I would advise everyone considering building a waterfall landscape, to do the proper research on the safest materials and the safest waterfall ideas.
Also, check out my other grey rock rainforest waterfall project, it's slightly different which might give you more ideas for your own waterfall.
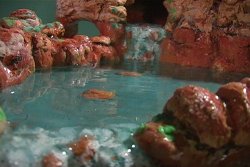
Check out the videos below on how to build a waterfall for a terrarium.
How to build a waterfall for a terrarium PART 1
How to build a waterfall for a terrarium PART 2
Special note: the second video incorporates an expanding foam product. Expanding foam is considered to be very toxic, and you should use a professional gas mask, gloves, protective eyewear and protective clothing when using it. Ideally you want to use this stuff outdoors and let it cure for over 24 hours.
How to build a waterfall for a terrarium PART 3
To make this project waterproof I used a combination of two different sealers. After the waterfall construction was finished, I used four coats of a non-toxic acrylic -called shields all (found at this site: hytechsales.com/prod50.html). Then for the areas to be constantly submerged in water, I used aquarium safe silicone sealant (found at Home Depot)-by smearing one layer of the silicone all over what would become the two lagoons. To be safe, I went beyond what I knew would be the water lines, and then sprinkled some colored sand as a way of covering up the look that the silicone leaves behind.
I also sprinkled colored sand all over the visible sections of the sculpture -after the last layer of acrylic was applied. This counteracted the "shininess" left behind by the acrylic sealant.
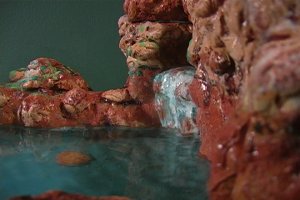
Other ways of creating waterproof waterfall ideas are listed below:
Even though the above idea seems sound, aquarium safe silicone has been known to fail every now and then (hence the reason why it is sold in small tubes to the average consumer -in order to repair leaks in fish tanks). There are other ways of creating a waterproof DIY waterfall, they just might not be as aesthetically pleasing. One idea would be to use a store-bought glass or ceramic container in which to hold the water. You could build up fake rock around one of these containers, seal the fake rock with acrylic -which is water repellent and presto you've got a pond that would never leak.
Another idea to create a waterproof aquarium waterfall, is to make the pond or ponds out of clay. Once you constructed the design, you would fire it in a kiln then glaze it and fire it in a kiln again. Basically this process creates a glass-like safe seal that would never output any chemicals or gas into the water the structure is holding. You could then build up around the ceramic pond with the fake rock ideas presented on this website, or just create the entire structure out of clay. The problem with creating the entire structure out of clay is it would become extremely heavy, unless the structure you're building was rather small.
There is also the possibility of finding a non-toxic plastic reservoir to hold your water, I have not researched this yet but feel free to do so and get back to me. In addition to that you could research outdoor pond sealers. You know their non-toxic, and I think some companies will send you a sample upon request (which may be all you need), but again this is a method I have not tried and thus cannot vouch for it. Research it and get back to me.
The last idea in creating a waterproof waterfall landscape is to use the aquarium itself as the reservoir to hold the water. You would need to create a divider with glass and silicone. The big catch to using this idea is that you would have to remove the water however so often as you would do to clean a regular fish tank. It would be much quicker and easier to have a removable reservoir to replenish freshwater as often as you wish. Take the above waterproof waterfall ideas and decide for yourself which technique would be best suited for you. If you have any other ideas on creating waterproof waterfall landscapes, please don't hesitate to share!
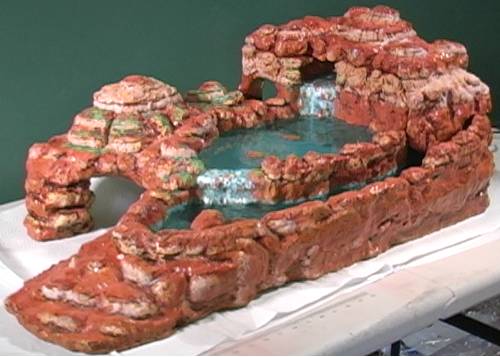
One thing I did at first was to test out the pump/filter unit I had bought. I ended up going with the Tetra Repto filter which seemed to have good reviews online. To test it I used a Rubbermaid container and an empty plastic ice cream container (these were both used to simulate the two ponds for the finished waterfall construction). Testing it out like this, I could see just how deep the water had to be for the filter to work properly. This test also let me know how loud the filter was and how loud the dropping water was. The test also gave me an indication of how I wanted the waterfall to look.
Questions you need to ask yourself are how far do you want the water to drop before it hits the level of water in the pond or ponds within your waterfall landscape. Are you really going to be able to handle a constant waterfall sound in your living room -or worse bedroom.
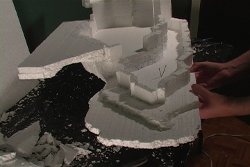
The landscape of the waterfall was constructed using sheets of polystyrene (Styrofoam). In addition to the Styrofoam I used a couple of cans of Great stuff expanding foam. The process of using great stuff expanding foam, which can be seen in the videos above on how to build a waterfall, helped to build up the waterfall landscape in a more random and organic way.
To glue together the pieces of polystyrene I used Loctite's power grab, which is similar to liquid nails.
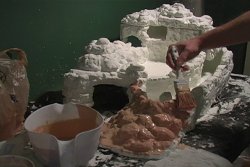
After completing the foundation of the homemade waterfall I covered the polystyrene sculpt with three layers of non-sanded grout. You want each layer to be somewhat like thin pancake batter (not watery). After the third layer was applied I mixed up a batch of very thick grout to add more rocklike protrusions to the landscape. The thick grout has very little water in it, achieving the consistency of thin clay.
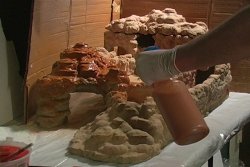
After the grouting stage I gave it a base coat paint job. My goal was to pattern the look of this DIY waterfall around the Grand Canyon's Havasu falls. It's not a precise model of Havasu falls, instead I took basic ideas from looking at pictures of Havasu falls, and of course other waterfall photos from around the world. You should definitely do some research for your own waterfall ideas to potentially create the most realistic and appealing waterfall. If you're building a waterfall in a much more simplistic way, you might consider fake leaves and/or vines they sell at pet stores in order to cover up or hide the pump/filtration unit.
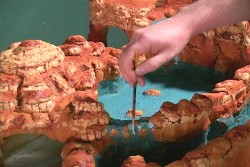
Once I was satisfied with the look of the waterfall landscape I moved on to the sealing stage. I used a product called Shields All which is a non-toxic acrylic sealer. I applied four coats, and in between each coat I allowed 48 hours to pass for the sealant layer to cure. Then I used aquarium grade silicone on all of the areas that were going to be submerged 24 hours a day. As I stated earlier the process I used is as safe as I could get it, it doesn't mean that it isn't possible for problems to arise.
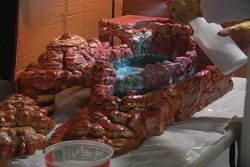
I did provide other alternatives (earlier) for you to consider -in regards to making your pond or ponds 100% waterproof. Please weigh the pros and cons and decide for yourself the best way to completely seal your homemade waterfall.
As mentioned earlier, to counteract the shiny look of the sealants, I sprinkled colored sand over most of the fake rock project.

In your search of how to make a waterfall scour the Internet for waterfall pictures of various waterfall landscapes and get inspired to create your own waterfall ideas. Don't forget to watch the above videos on how to build a waterfall.
Also, check out the Lizard store for fun lizard products!


