|
Fake rock wall construction -intermediate level
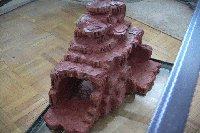
So you want to create a fake rock wall? This project might be a great way to start. It's not very big (it can be scaled up or down in size) covering only one corner of the tank, it provides a basking spot and a hide underneath. I've created a video that covers the process from start to finish of this intermediate level fake rock wall. Use the ideas and change the design to suit your needs, or copy it directly and scale it up or down depending on your lizard terrarium size. Also, check out the Lizard store for fun lizard products!
The first thing you want to do is figure out the width and height that would be appropriate for the size cage you have. After you add grout to the finished polystyrene design the fake rock will become considerably heavier and a little bit bigger. After measuring, I cut out a floor plan and glued that together, then progressively built up from the bottom adding small pieces of polystyrene. I put in a back support beam, and a smaller front support beam. These two pieces
provided something for the other pieces to attach to.
With each piece I was adding, I would break off any straight edges with my fingers. this helps the finished product look more like real rock. The more straight edges and right angles you can eliminate, the more realistic it will look. With any type of project like this you need to be mindful of what type of pet lizard you have and what it's climbing abilities are and what behavioral habits it has. A blue tongued skink, which is mainly terrestrial, might find this project too challenging to climb. On the other hand, your pet lizard, being a captive fellow -may be more inclined to try something it otherwise would avoid in the wild. Translation: you know your pet lizard's limitations. On to the grouting process. This is a fun step, -oh wait no it's not. The grouting stage
could be thought of as a time-consuming mess.
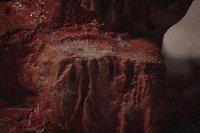
The first coat should be rather thin to get in all of the little nooks and crannies. There should be at least three coats -with each new coat getting progressively thicker. One thing I do to each new coat is add a little bit of cement color mix. Doing this lets you know where you left off if you get called away from the project. After I applied at least three coats of grout I moved on to the detail stage. I mixed up a very thick batch of grout and applied globs in certain areas on the fake rock wall. I let those globs dry for two to 10 minutes, went back, and with a knife created vertical grooves to resemble ridges. I also went back and reestablished some detail that was lost in the polystyrene sculpt.
I added detail by using a dry sponge technique. This consists of loading a sponge or paintbrush with a certain color(in this case light sandstone) then removing most of the paint on a rag or paper towel. Then with the sponge, lightly touch the ridges of the fake rock wall to give the rock a weathered look. This might take some practice. I also went back in using a small brush and added a little bit of dark brown to the ridges I created. If done right this simulates shadows and hopefully increases in the look. 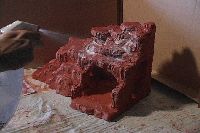
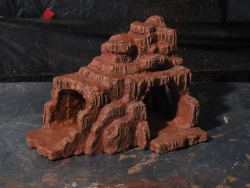
After you finish painting you need to seal it with a non-toxic sealant. Once again I used a cheap water bottle, put some all surface non-toxic sealant mixed with water and you got a fast way of applying sealant. For the last layer I brushed on a non-thinned out layer of sealant on the high traffic areas. Before the last layer dried I sprinkled some fine grain sand on the high traffic areas. This will give your pet lizard some traction and will hopefully increase the dry look. Important Note This particular project is meant for a lizard with a dry landscape. If you have a high humidity lizard, such as a water Dragon or chameleon, you want to use a non-toxic 100% acrylic sealer. This is more water repellent than Mod Podge all surface sealant. If you want something that you can totally submerge in water, you'll want to experiment with aquarium silicone sealant. They use this to make sure an aquarium won't leak, so obviously water is around it 24/7. Aquarium silicone sealant does have a different look to it though, it will dry in a flexible rubber-like consistency. To ensure your pet lizard is safe climbing on this structure you might want to add some Velcro in certain areas for stability. If you have a large lizard such as a monitor you would obviously need to scale this project up in size. I would also add a lot more grout to improve the strength of this fake rock wall.
|


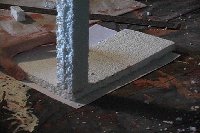 I eventually put a top support beam lying horizontally, and was able to build up from there.
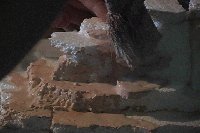 I use a non-sanded white grout because it's the least expensive. But you could use a colored
grout and have that be the way you incorporate the fake rock wall's color.
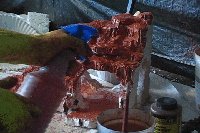 I then proceeded to paint it. You can obviously use a paintbrush or sponge, but
a faster way is to get a cheap water bottle to act as a paint gun. I put a little bit of paint
mixed with a little bit of water in the bottle. Depending on how much water you use some very interesting transparency effects can happen.
 Don't forget to check out the video detailing the entire process of this
