|
Fake rock construction -for the beginner
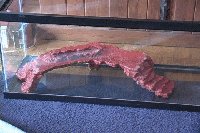
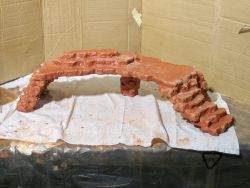
For those of you who haven't created fake rock, this particular project might be a great way to start. First of all, I guess it's more of a fake rock bridge. I purposely made it really simple to show that -something very easy to make, could look halfway decent in your lizard terrarium. The important things are there, such as creating more floor space for your pet lizard. It provides something interesting for the lizard to engage with, as well as exercise on. And it also provides a hide which hopefully reduces stress for the lizard. For you, it might increase the aesthetic look of the lizard cage. I've created a video that covers the entire process of this beginner fake rock wall. Take the ideas presented and expand upon them. After watching the video you can probably see how one could create this, or something similar, in an even more simplistic way.
The materials I used: Polystyrene(styrofoam) Liquid nails Knife Non-sanded grout (white is the cheapest) Cement color Acrylic paint A dollar store water bottle Non-toxic all surface sealant fine grain sand
The first thing I did was figure out how long, wide and tall I wanted the fake rock to be.
One of the only mistakes you can make with this project is not being able to fit the structure
back into the cage.
Measuring, and taking into account the added weight and size of the structure
after the grouting process -is crucial.
Then I cut out some stairs, which consisted of rectangles that were roughly 3 x 4 inches. With just my fingers, I broke off little bits of the edges of the rectangles. I did this to try to get an uneven natural rock like look. The more unplanned and random this process is, the better it'll look like natural rock. Having said this, it's impossible to make a mistake. There's no real artistic talent going on, it's just a process of getting rid of the straight lines or edges and right angles. The grout does the rest to simulate a natural rock -like look. 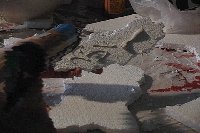
For each rock staircase I had six stairs of equal height so that the final structure would not wobble. Towards the back of the structure I put a support beam to counteract swaying. I glued the stairs together (using liquid nails) in an ascending style, let them dry overnight, and then glued them
to the underside of the top section. I let that dry overnight, then I started the grouting process.
A way of adding color and grout to the fake rock at the same time, would be the obvious choice of: getting a colored grout, or you could mix in some cement color. Another way is getting some cheap acrylic paint and using a sponge or brush to apply it. -A faster way, is getting a dollar store water bottle and mixing a little bit of water and a little bit of paint; and you've got a cheap paint gun. 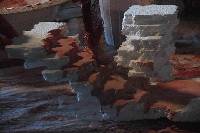
A very important stage to creating fake rock is to make sure you apply several layers of a non-toxic sealant. What I ended up doing was using another dollar store water bottle. I put some non-toxic all surface sealant in the bottom and mixed that with a little bit of water. I had to make sure it was thin enough to be able to flow through the spray bottle. I put at least four coats of this on, making sure to turn the structure over and get the underside. For the final coat, I used the straight sealant (without thinning it with water) and brushed on a layer covering the high traffic areas. I also applied another coat to the basking spot for extra protection against the heat and wear and tear. Important Note This particular project is meant for a lizard with a dry environment. If you have a high humidity lizard, such as a water Dragon or chameleon, you want to use a non-toxic 100% acrylic sealer. This is more water repellent than Mod Podge all surface sealant. If you want something that you can completely submerge in water in a terrarium, you'll want to experiment with aquarium silicone sealant. They use this stuff to make sure an aquarium won't leak, so obviously water is around it 24/7. Aquarium silicone sealant does have a different look to it though, it dries in a flexible rubber consistency. For this particular project -as the last layer of sealant was drying, I sprinkled a little fine grain sand to the areas where the pet lizard might need traction. This is also a good technique for creating a much more natural dry look. You can also experiment with grades of steel wool or very fine grade sandpaper to battle the shiny look. To make sure the fake rock doesn't move around in the cage I put relatively small pieces of Velcro on the bottom of the structure and the bottom of the tank. Yes these will get soiled but Velcro is relatively cheap, and sometimes you can find a certain area on the fake rock that might be less likely to get soiled. 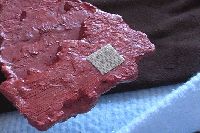
The other thing to consider with this project is what type of pet lizard you have. If you have a type of lizard that likes to climb you could make this fake rock a bit more challenging. If you have a pet lizard that spends most of its time on the ground, you could alter this project so that it's extremely easy to climb with a more close to the ground hiding space underneath. If you have a large lizard such as a savanna monitor or iguana you will want to scale this project up so that its much larger with a lot more grout. Your pet lizard will appreciate it. It'll be something for it to engage with and hide under. It needs something to entertain itself with while you're at work for eight hours at a time!
Check out the video that demonstrates the entire process of this beginner fake rock wall. |


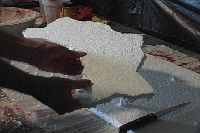 First, with the measurements in mind, I drew a basic shape in freehand for the top of the structure.
I then cut that out with a knife.
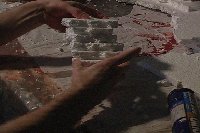 Using non-sanded grout, mixed with water, I put four coats over the entire structure. The last coat was a little bit thicker than the previous coats. You want to make sure the first couple of coats
are somewhat thin to get in all of the little crevices.
